...
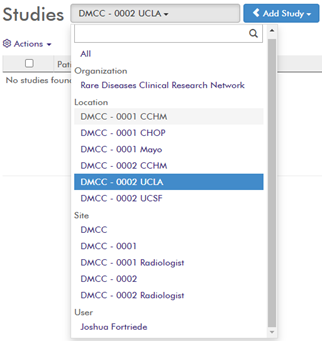
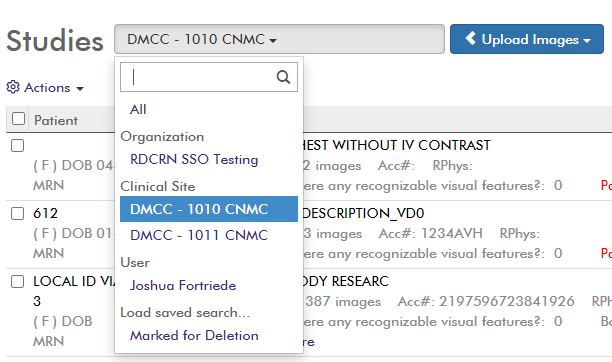
Choose the location where the uploaded images will be uploaded, click “Add Study”“Upload Images”, and then select “Upload Studies”.

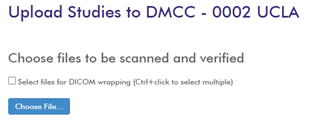
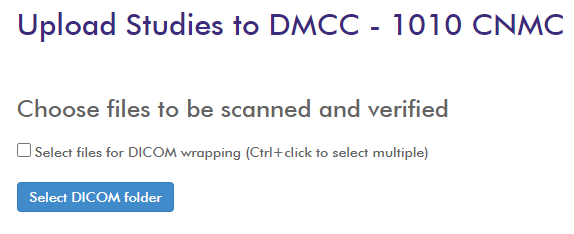
Click “Choose File…” “Select DICOM folder” to select the folder that contains the imaging files to upload. You will then receive a prompt stating how many files will be uploaded, and it will ask you to “Upload” or “Cancel”. Click “Upload” to continue. There may or may not be a checkbox to “Select files for DICOM wrapping”. Use this feature only if you are uploading photos (jpgs, pngs, etc) and not if you are using normal DICOM files.
Note: When you are uploading DICOMs, you will be selecting a folder and not individual files. The selected folder and sub-folders will be scanned for any DICOM files.
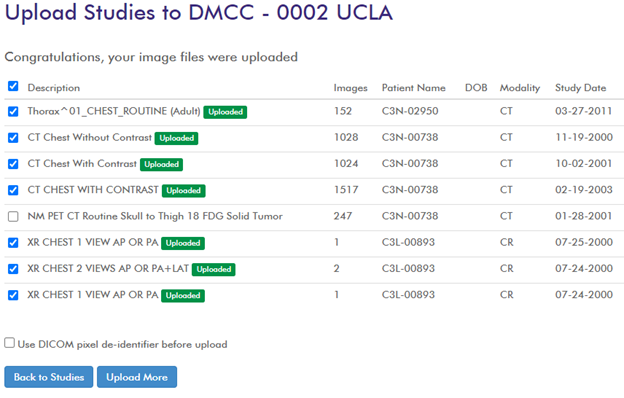
After scanning the files, a table will appear that summarizes the image files. Each row represents an individual series in an Imaging Study, and provides general information about that series; including the series description, number of images, modality type, study date, and patient’s name and DOB. Series can be unchecked to remove them from the upload process.
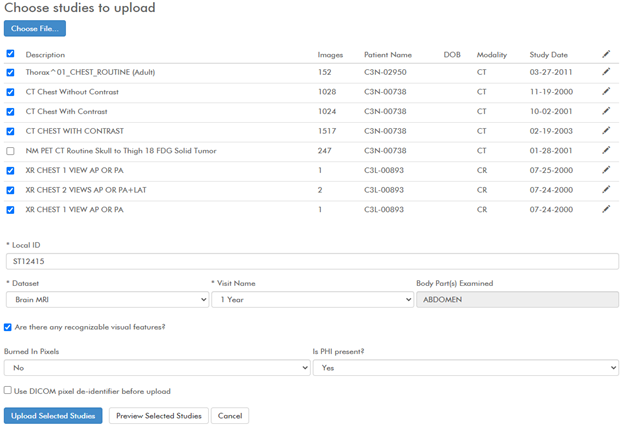
Below the table are a series of fields that need to be filled out. These fields will vary depending on the protocol, including if they are already pre-filled or not. Required fields will have an asterisk “*” preceding the field label. The values in these fields are associated with each study/series that is uploaded. To selectively change a field value for an individual series, click the edit button 🖋 next to the series.
If the images contain pixels that need to be removed (such as Dose Reports, or embedded PDFs), this can be done prior to upload or once the images are within Ambra. To mask pixels prior to upload click the “Use DICOM pixel de-identifier before upload” button.
Once all fields are filled out, click “Upload Selected Studies”. Upload progress is displayed, and you will see a notification of when all images have been uploaded.
...
| View file | ||
|---|---|---|
|
Creating Reports
Users are able to create reports in Ambra in all of the name spaces in which they have access. To create a report, click “detail report” at the bottom right hand corner of the screen.
...
Upon clicking “detail report,” a box will appear to select which variables the report should show. One all columns are selected, an Excel file of the report will download.
Helpful fields to select could include:
Modality - which shows the image type (i.e. CT, MR, OT). NOTE: OT likely means the images is a WRAPPED DICOM file.
image_count - number of total images from all studies
clinical_site - site in which images were uploaded
Consortia - count of the numbers of studies for a particular study
protocol_id - RDCRN protocol number in which images were uploaded
global_local_ID - listing of the local IDs that have imaging studies uploaded
...
To see the report data in tabular format, create a Pivot table in Excel.
To create a report of number of studies by site in a particular study, complete the following steps:
Select all columns in the Excel report
Navigate to the Insert tab, then select Pivot Table
Select “clinical_site” for the rows and “Consortia” for the values
...
Support
The support page can be accessed by clicking the “Help” link in the upper portion of the page.
...
If you are unable to log into the Ambra platform or experience slowness or other oddities, please check the Ambra status page to see whether there is an issue with Ambra itself.
Submitting tickets to the RDCRN Helpdesk
...