...
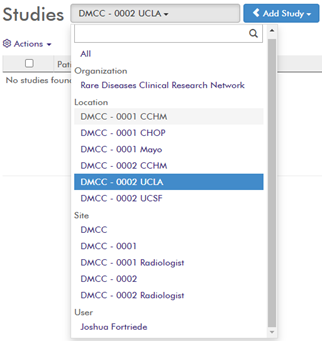
Choose the location where the uploaded images will be uploaded, click “Add Study”, and then select “Upload Studies”.
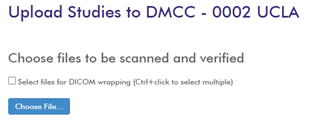
Click “Choose File…” to select the folder that contains the imaging files to upload. You will then receive a prompt stating how many files will be uploaded, and it will ask you to “Upload” or “Cancel”. Click “Upload” to continue. There may or may not be a checkbox to “Select files for DICOM wrapping”. Use this feature only if you are uploading photos (jpgs, pngs, etc) and not if you are using normal DICOM files.
After scanning the files, a table will appear that summarizes the image files. Each row represents an individual series in an Imaging Study, and provides general information about that series; including the series description, number of images, modality type, study date, and patient’s name and DOB. Series can be unchecked to remove them from the upload process.
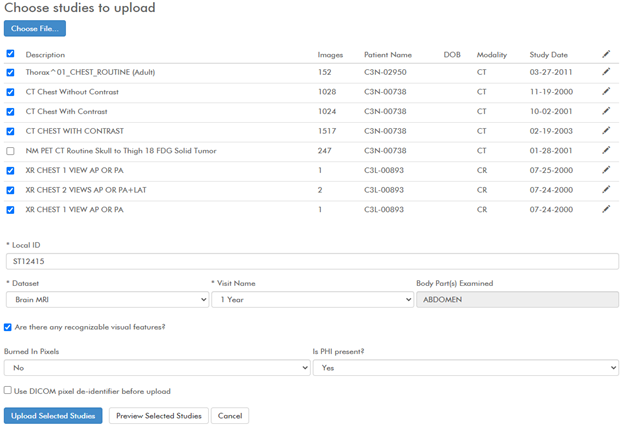
Below the table are a series of fields that need to be filled out. These fields will vary depending on the protocol, including if they are already pre-filled or not. Required fields will have an asterisk “*” preceding the field label. The values in these fields are associated with each study/series that is uploaded. To selectively change a field value for an individual series, click the edit button 🖋 next to the series.
If the images contain pixels that need to be removed (such as Dose Reports, or embedded PDFs), this can be done prior to upload or once the images are within Ambra. To mask pixels prior to upload click the “Use DICOM pixel de-identifier before upload” button.
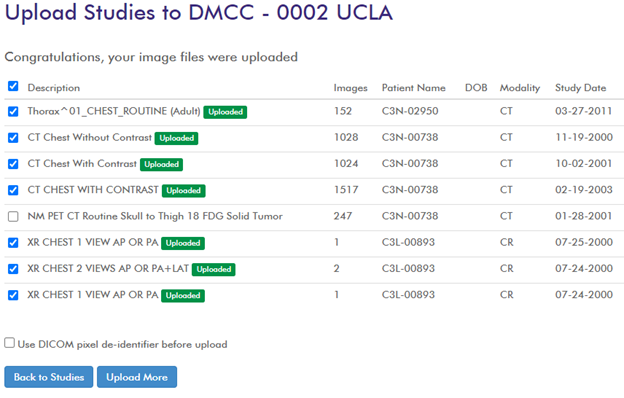
Once all fields are filled out, click “Upload Selected Studies”. Upload progress is displayed, and you will see a notification of when all images have been uploaded.
...